The Art and Science of Applying Decals
Applying decals may seem simple at first glance, but there is actually an art and science to getting it right. From choosing the right type of sticker to the technique of application, various factors contribute to the final look and longevity of the sticker.
Why Proper Application Matters
Improperly applied stickers can peel, fade, or bubble over time, ruining both the decal and the aesthetics of the surface it’s applied to. Proper application ensures longevity and a professional appearance.
Choosing the Right Decal for Your Surface
Not all decals are suitable for all surfaces. Stickers adhere best to smooth surfaces. Rough or textured surfaces may not provide proper adhesion. The surface should be flat or gently curved. Sharp or complex contours can make sticker application difficult (professional installation is required in this case). Also it is important to consider whether the surface is indoor or outdoor.
- Vinyl: Durable, waterproof, suitable for both outdoor and indoor use.
- Paper: Less durable, best for indoor use.
Permanent vs. Removable
- Permanent: Hard to remove, may leave residue.
- Removable: Easier to remove but less durable.
Important!
All of our decals and stickers are made from high-quality Avery, Oracal, or Ritrama vinyl films and come with a guarantee of up to 5 years for outdoor usage from the manufacturer. We do not sell less durable paper-based stickers. All our decals are removable.
Cleaning the Surface
Clean the surface thoroughly to remove dust, grease, and any old adhesive tracks (if any other stickers were there in the past). The application area must be completely free of dust and other debris; otherwise, the decal may not adhere properly or last as long.
Step-by-Step Guide: Applying Decals to any smooth surface
Tools You Will Need:
- Squeegee or credit card
- Cleaning solution
- Lint-free cloth
- Masking tape
- X-Acto knife or scissors

Dry Method
- Clean the Surface:
- Clean the area thoroughly with rubbing alcohol or soap and water solution. Do not use Windex or similar products because it will leave a residue behind that will prevent the sticker from adhering well. Wipe and allow to dry.
- Prepare the Decal:
- When you receive your decal in the mail, lay it flat and firmly wipe a credit card or application squeegee across the top of the transfer tape. This helps to make sure the transfer tape properly adheres to the decal. This is especially important if the decal was shipped in a mailing tube.
- Peel Backing:
- Carefully remove the backing paper. If the sticker stuck to the backing, slowly replace the paper backing and repeat Step 2.
- Apply Decal:
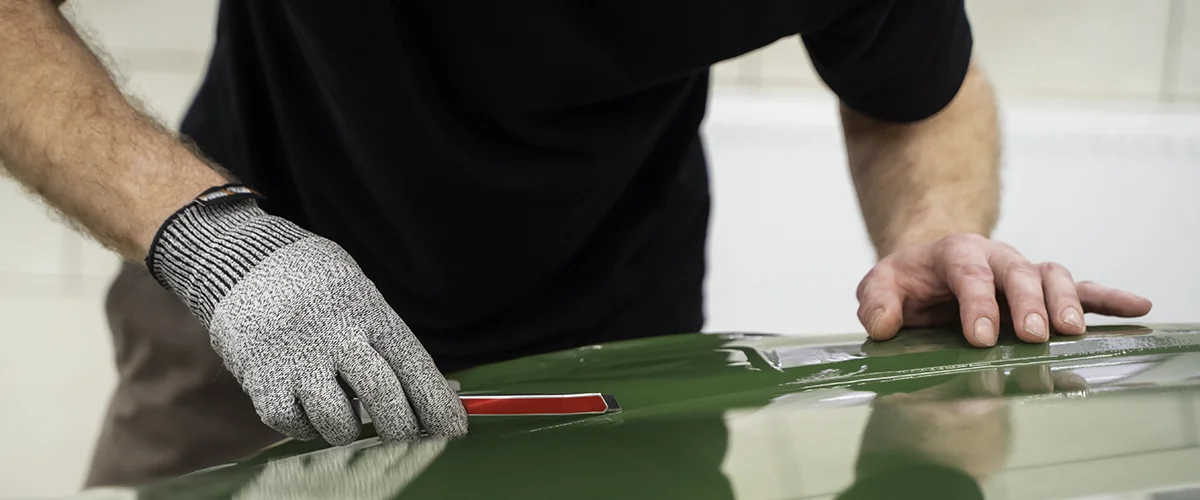
- Align the decal and press it onto the desired surface. Firmly run a squeegee or credit card across the transfer tape from center to edges to make sure the decal adheres to the surface. Slowly and carefully peel the transfer tape from the top of the decal. Don’t pull the tape away from the surface. Peel the tape at a sharp angle, so you may press on top of the decal as you peel. If any part of the decal starts to come up with the tape, run over that part of the decal with a squeegee or credit card and try to peel the tape again.
Wet Method
The wet application method uses a simple fluid to prevent the graphic from immediately sticking to your surface. This gives you time to work with the material and encourages the release of bubbles. You can even move the graphic around before you squeegee out the application fluid. This method is often preferred for larger decals, intricate designs, or when precise placement is essential.
- Clean the Surface:
- Clean the area thoroughly with rubbing alcohol or soap and water solution. Do not use Windex or similar products because it will leave a residue behind that will prevent the sticker from adhering well. Wipe and allow to dry.
- Prepare the Decal and the Surface:
- Place the graphic face down (“transfer tape“ down) on a clean, flat surface. Slowly peel away the protective backing exposing the adhesive. Do not allow the sticky part of the vinyl decal to touch anything. Generously spray both the adhesive of the graphic and the surface with application fluid (use a solution of about 5% soap / 95% water). Be sure this area is completely sprayed down. From this point on, remoisten any areas which start to dry before you get a change to work with the material.
- Apply Decal:
- Place the adhesive side on the surface. While wet, carefully measure and adjust the vinyl decal. Once it is placed, use a squeegee with firm strokes beginning at the center to force application fluid out to assure firm placement. Repeat until you remove most of the application fluid between decal and surface. Ensure there are no fluid or air bubbles.
- Finishing touches:
- Wait 15-30 minutes for the adhesive to bond to the surface. Once dry, peel off the “transfer tape” from the decal and surface. If peeling occurs, re-apply decal with a squeegee (Step 3), and wait about 30 minutes before you remove the “pre-mask” again.
In summary, the dry method involves applying the sticker directly to the surface without any liquid, while the wet method uses a liquid solution to facilitate positioning and reduce the risk of errors during application. The choice between the two methods depends on the size, complexity, and specific requirements of the vinyl sticker being applied.
Possible Issues and How to Fix It
Bubble Formation
Cause: Air trapped under the sticker. Even the best of applications may have a few bubbles left but not all is lost.
Solution: Use a squeegee during application. There are some simple things you can do to deal with bubbles.
- Remove Bubbles: Push them towards the edge of the sticker.
- Seal Edges: Press firmly on the edges to seal.
If the method above is not working (bubbles remains on their position and doesn’t move anywhere) use the tips below:
- Small Bubbles: If the bubbles are small, wait a few days to see if they dissipate on their own. Direct sunlight and temperature changes can make a big difference. You can always puncture them later.
- Bigger Bubbles: If the bubble is larger or just won’t go away on their own, you can puncture it with a small pin. Puncture the pocket on the edge and use a squeegee or credit card to press the graphic to the surface. Start on the opposite side and work towards the puncture.
Peeling Edges
Cause: Incomplete adhesion during application.
Solution: Press firmly on the edges during application.
Mistakes to Avoid
- Not cleaning the surface thoroughly
- Not measuring before applying
- Rushing the application process
Best Conditions for Decal Application
- Temperature between 50°F and 90°F (10°C – 30°C). Extreme (higher or lower) temperatures can affect adhesion. Apply stickers in a controlled environment whenever possible.
- Low humidity. These conditions often result in drier application surfaces. This allows the decal to set and adhere faster, reducing the time you need to wait before the decal is fully affixed to the surface.
- Indoor application is recommended. If outdoor application is necessary, ensure that the weather is not windy to prevent the spread of dust to the adhesive layer and application surface.
Aftercare: Making Your Sticker Last
- Avoid Car Washes Right After the Install: For at least the first 24 to 48 hours after application, avoid washing your car, especially in high-pressure car washes. The high-pressure water and chemicals can damage the decal’s adhesive before it sticks well.
- Be Gentle: When it’s time to clean your vehicle, use a hand wash method if possible. Use a mild detergent and a soft sponge or cloth. When washing the decal area, avoid vigorous scrubbing. Gently wipe the decal, and do not use excessive force.
- Parking in Shade: Whenever possible, park your vehicle in the shade or in a covered area. Extended exposure to direct sunlight can cause vinyl decals to fade over time.
- Regular Inspection: Periodically inspect your decals for any signs of damage or peeling. If you notice any issues, address them promptly to prevent further damage.
Mastering the Art of Decal Application
With the right preparation, tools, and technique, applying stickers can be a straightforward process that yields professional results.
Decals are an awesome way to display your personality, message, or branding on various surfaces. With this guide, you’re now armed with all you need to apply decals effectively and maintain them for a lasting impression. So go ahead, let your imagination run wild and make your statement as loud or as subtle as you want!